
GIMP Tutorial: Photo Presentation
In this tutorial you will learn how to quickly edit a photo for a presentation with GIMP, a free image editor.
You will need to install GIMP, which you can download for free.
The Aim:

A photo with rounded edges that fade out gradually.
Step One: Open Your Photo
Open your photo in GIMP with GIMP's File > Open menu. Here's what you should be seeing when you're done:

(Click to enlarge thumbnail).
Step Two: Selecting a Rounded Rectangle
Select your photo with Select > All, then select a rounded rectangle with Select > Rounded Rectangle. Adjust the radius until you are happy; if you make a mistake press Ctrl+Z or Edit > Undo to undo your changes.

(Click to enlarge thumbnail).
Step Three: Shrink Your Selection
Go to Select > Shrink and shrink your selection by about 25 pixels.
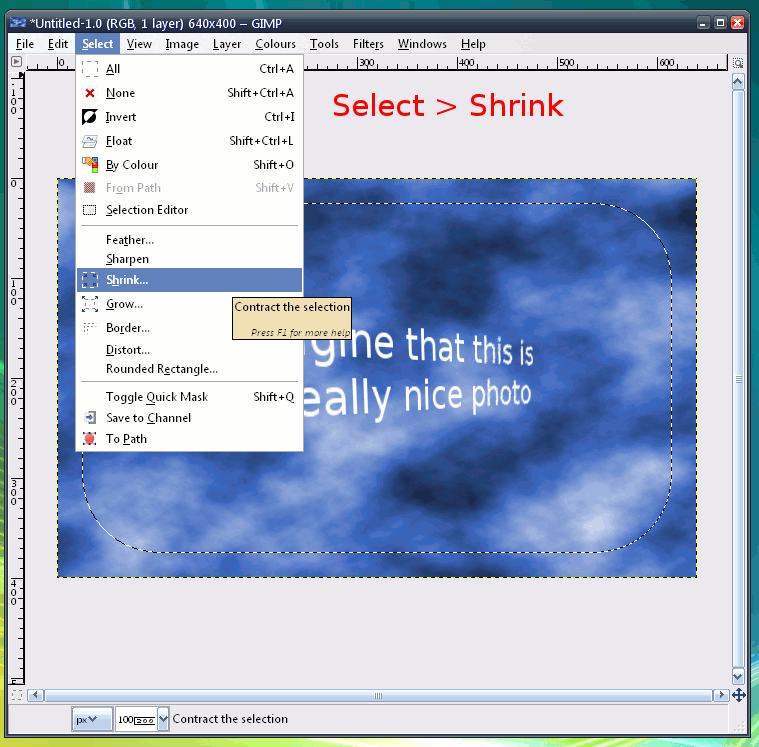
(Click to enlarge thumbnail).
Step Four: Feather and Invert
Go to Select > Feather and feather the selection by the same amount that you shrunk it by in step three, e.g. 25 pixels. This smoothes out the selection so that it fades away gradually.
Then go to Select > Invert.

(Click to enlarge thumbnail).
Step Five: Delete and Finish!
Press the delete key on your keyboard, and with luck your photo will look like this:
Go to File > Save As and save your photo as a JPG, e.g. "My Photo.jpg".
Congratulations, you're done! If you liked this tutorial, please consider or RSS.
Stay Subscribed
, subscribe to the RSS feed or get updates by e-mail.
You can also contact me directly - I make an effort to reply to every e-mail.